vExpert Homelab 1 - Setting up a Cisco 3550 switch from scratch
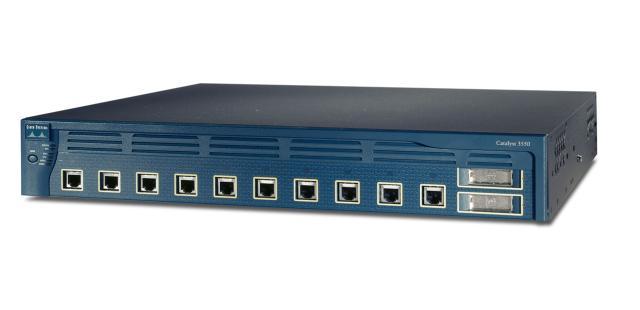
I’ve been running a homelab for a number of years, but with the impending release of vSphere 6, my pair of old HP ML115 servers were looking a little tired. After being selected as a vExpert in 2015, I figured it was time to treat myself to some new infrastructure and also to rig up a proper network solution to underpin it all. I’d had an old Cisco 3550 (the layer 3 version) hanging around for a while waiting for this moment. I’m going to be using Intel NUC servers, so this is not going to go as far as nic teaming. This first post in my homelab series explains what I did to get the thing up and running with a very basic configuration,
I found some of this information easy to get hold of and some a little more tricky to find, so I hope assembling this in one place helps someone other than just me!
If you see nothing on the screen at any time, press enter to get things moving. Same after all the commands you will issue here of course!
Step 1 - Get hold of a computer with a laptop port or alternatively source and install a USB to Serial adapter.
Step 2 - If your OS doesn’t have one, obtain a terminal program that will allow you to connect using XMODEM. I’m a windows user so I grabbed a copy of the free open source Tera Term application from http://ttssh2.sourceforge.jp/index.html.en
Step 3 - Assuming you know nothing about the switch as if you had, for instance, bought it off ebay, then you don’t know any of the passwords etc. needed to deal with the switch itself, so hook up your console cable (the one that came with the switch) open up your terminal app and set it to 9600 baud. Then hold down the MODE button on the front of the device and plug in the power cable. Don’t let go of the mode button until a couple of seconds after the light above port 1 goes out.
Step 4 – Within a few lines of code, you will either see a message telling you that the password-recovery mechanism is enabled or disabled.
Step 5a - If the password-recovery mechanism is disabled, then you will be asked if you want to set the system back to the default config, say yes. Then at the “Switch>” prompt, type
boot
Step 5b - If the password-recovery mechanism is enabled, then you should see a short list of commands you can run, type in
flash_init,
which is one of the options. Then type the command
load_helper
(which may do nothing) then the command
dir flash:
When you see the directory of files, including config.text, type in
rename flash:config.text flash:config.test.old
boot
to copy the config and reboot the system.
Step 6 – You should be prompted to continue with the configuration dialogue, so say yes to those questions:
Would you like to enter the initial configuration dialog? [yes/no]: yes
At any point you may enter a question mark '?' for help.
Use ctrl-c to abort configuration dialog at any prompt.
Default settings are in square brackets '[]'.
Basic management setup configures only enough connectivity
for management of the system, extended setup will ask you
to configure each interface on the system.
Would you like to enter basic management setup? [yes/no]: yes
Step 7 - Enter a host name for the switch. Keep the name under 28 characters length and don’t use -n, where n is a number, as the last characters in the host name.
Enter host name [Switch]: host_name
Step 8 - Enter an enable secret password and an enable password. The passwords can be up to 25 alphanumeric characters, can start with a number, are case sensitive and allows spaces. The secret password is encrypted. The enable password is in plain text.
Enter enable secret: secret_password
Enter enable password: enable_password
Step 9 - Enter a virtual terminal (Telnet) password. The password can be from 1 to 25 alphanumeric characters, is case sensitive, allows spaces, but ignores leading spaces.
Enter virtual terminal password: terminal-password
Step 10 - Next up is the option to configure SNMP, but since you can configure SNMP later, enter no at the prompt.
Configure SNMP Network Management? [no]: no
Step 11 - Enter the interface name of the interface that connects to the management network. On this switch, it appears that you should always use vlan1 as that name.
Enter interface name used to connect to the
management network from the above interface summary: vlan1
Step 12 - Configure the interface by entering the switch IP address and subnet mask.
Configuring interface vlan1:
Configure IP on this interface? [yes]: yes
IP address for this interface: 10.10.10.10
Subnet mask for this interface [255.0.0.0]: 255.255.255.0
Step 13 - Enter Y to configure the switch as the cluster command switch. Enter N to configure it as a member switch or as a standalone switch. Again, this can be configured later, so say no.
Would you like to enable as a cluster command switch? [yes/no]: no
That’s enough to get the switch working, so the switch displays its initial configuration. This is an example of the output that appears:
The following configuration command script was created:
hostname host-name
enable secret 5 $1$Ulq8$DlA/OiaEbl90WcBPd9cOn1
enable password enable_password
line vty 0 15
password terminal-password
no snmp-server
!
no ip routing
!
interface Vlan1
no shutdown
ip address 10.10.10.10 255.0.0.0
!
interface FastEthernet0/1
!
interface FastEthernet0/2
interface FastEthernet0/3
!

!
interface GigabitEthernet0/10
!
end
Step 14 - After the configuration output, the following choices appear:
[0] Go to the IOS command prompt without saving this config.
[1] Return back to the setup without saving this config.
[2] Save this configuration to nvram and exit.
Select option 2 to save the configuration to NVRAM within the switch (the startup config)
Enter your selection [2]:2
That’s enough for the initial config. Then you can go and configure the rest of the switch when you telnet to the address you configured on vlan 1, as the switch definitely responds on port 1. There’s more to do yet, that will be in the next post!