vExpert Homelab 5 - ESXi 6.0 - Nuc Nuc Nuc
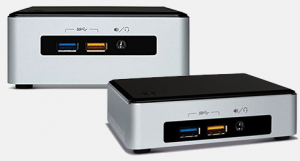
It was time to replace my old workhorse HP ML115’s with some new kit ready for the vSphere 6 launch and given the amount of commentary around the community at large I decided to take the plunge and source a bunch of Intel NUC devices, namely the D54250WYK model.
No point doing things by halves, so I got three* and stuck 16GB memory in each, which should give me enough room to build a decent lab!
Unlike a widely reported issue with earlier versions, this generation of NUCs do come with the requisite cloverleaf power lead in the box, so the additional components I required for each unit were;
2x8GB SODIMM 1.35V memory
VGA to Mini display port converter
a usb key
Oh, plus a single slim USB keyboard, which I didn’t seem to have a spare of. Those old HP servers were using PS/2!
All you really need to do is pop in your laptop style memory by undoing the 4 screws underneath the device and then away you go. However, also unlike previous versions and more upsetting, these NUCs seem to need a monitor connected most of the time. Fortunately my lab has plenty of spares. Time’s been a bit scarce of late so I’ve not really looked in to this, but it would be more than a little tedious for most people.
In advance of the vSphere 6 release, I did throw vSphere 5.5 on to all three devices, with somewhat mixed results. The first one I built was rock solid and has replaced both my ML115’s already. The second and third however, had some particularly wobbly issues with networking, I never really got them to even respond to a ping reliably. You need to create a custom installation ISO for vSphere 5.5 as none of the types of Intel NICs used in their different NUC models are present on the ESXi 5.5 installation media. Rather than repeat what others have already blogged, you can find a lot of information on that setup on Florian Grehl’s blog.
Now, the dodgy ping news didn’t really upset me too much as Alex Galbraith had already tested vSphere 6.0 beta on his NUC farm and found that the Intel NIC driver was already on the installation media, so it didn’t need any customisations. That was good news and a strong driver for my purchasing decision. Alex has a whole series of blog posts on his NUC adventures, so go take a look at the relevant vSphere 6 post and review his others too.
So as soon as I could get my hands on the 6.0 ESXi iso, I had it hooked in to a copy of VMware Workstation 11 to test an installation- This vExpert thing is really paying some dividends for me.
All you have to do now is follow a small series of steps.
Create a VM under the custom installation options and set it as a ”vSphere 2015 beta” OS type.
You can leave the default CPU and Memory sizes, this never matters.
Create a small hard drive if you must, but you can delete that anyway before you turn the VM on. You don’t install anything at this point.
Before you turn the VM on, map the CD drive to your ESXi6 installation media.
Power on the VM.
Insert a USB key into whatever your running VM Workstation on and map it through to the VM.
- Click the relevant USB icon amongst the set of icons below the VM display to the right.
- Select Connect (Disconnect from Host)
Carry out a standard installation of vSphere, selecting your USB key as the installation drive.
Once installation finishes and you are asked to reboot, whip out the USB key.
Stick the key in your NUC and boot it up, it will now detect its own CPUs/memory size.
F2 and configure your management network etc.
Trash the VM you just used**
Job’s a good ‘un. I’m now getting a really solid ping from a previously “dodgy” NUC and it’s sitting in the new vCenter 6.0 ready for additional configuration.
Not a bad first evenings work.
- I’ve resisted the temptation to name them Curly, Moe and Larry, but I’m not sure if I will resist the temptation to have a 3 Stooges themed custom vCenter login backdrop. Hmm….
** However, the dodgy ping situation returned later, on the NUC that was previously OK. I spent a bit of time chasing my tail on this one, but I found that if I completely trashed the VM I was using to build the USB installation and re-deployed it for a new build, I was able to get another NUC running fine.